Miniplane-USA |
|
|
|
Assembly Instructions
Tips & Tricks Miniplane Pictures
|
Trimmers vs Speed BarWhat's the best way to increase the speed of your Powered Paraglider? Many power gliders are equipped with trimmers to make you go faster during flight. These are fine for reflex gliders and flying upwind for long periods of time if that's what you like to do, but for everyday flying, a speed bar is an excellent way to vary your airspeed. Using a regular paragliding speed bar, like the Ozone Pop-Up Speed Bar, is much better for many reasons:
Increasing the speed of a paraglider means lowering it's angle of attack, making any glider more susceptable to a delfation during turbulence. Being able to immediately return the glider to trim speed by simply retracting your leg from pushing on the bar gives you the confidence to use speed anytime you need it. Let's face it, flying a paraglider or paramotor is not about going fast, it's about enjoying the sensation of flight. If you want to go fast, perhaps flying a hang glider or sailplane will give you a bigger thrill. You can always go faster by using a smaller version of the very same glider you are now flying, so your wing loading is increased as well as your speed. The handling will be familiar, but more dynamic, resulting in something that is more familiar and comfortable. Enjoy the ride! - Chad Bastian
Miniplane Paramotor Speedbar Attachment & Adjustment
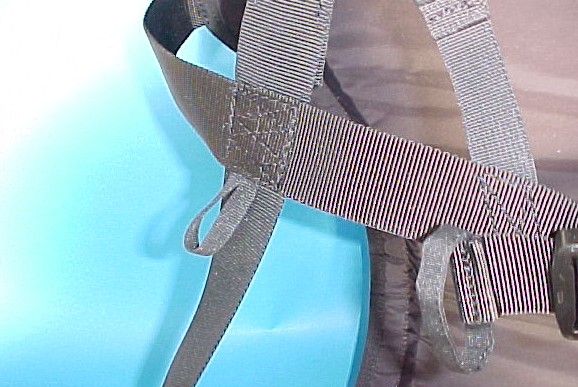
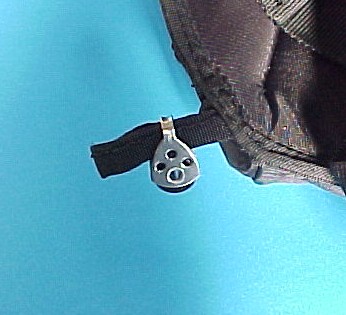
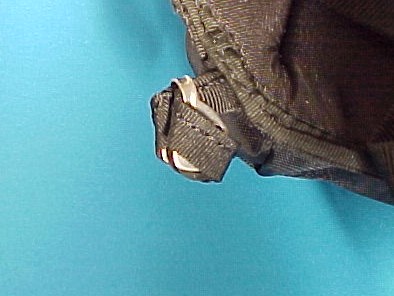
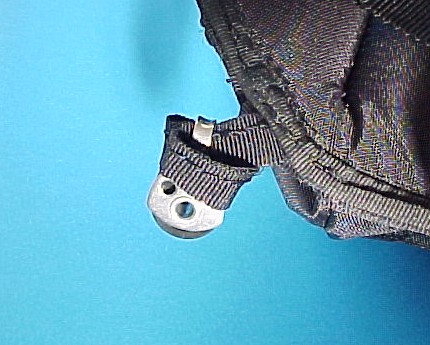
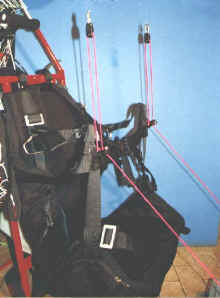
Attaching a Speedbar Accelerator to the Miniplane Paramotor is quick and easy, due to the nylon Speedbar loops that are sewn onto each Miniplane Harness! Please make sure that you use a simulator or a couple of ropes in a tree to hang your motor and harness with your glider risers attached and you sitting in it to make sure this is adjusted correctly. Four Pulleys are needed to operate the speedbar correctly, two on the loops near the Carabiners and two on the loops at the lower edge of the seat. Pulleys for attaching the Speedbar can be found HERE. Either the Starter Pulley, Speed Bar Pulley or any good small pulley can be used. Our favorite Speedbar is the Ozone Pop-Up Speedbar (available in our eBay store) because of the unique pop-up design which makes it much easier to find the speedbar with your foot. Plus, it has a two-step design that lets you control the amount of accelerator you push. I seldom use full speed, as this makes the glider somewhat unstable in textured air, but often use half bar (one foot pushing the loop on the Speedbar) to increase my speed, even when it's a bit bumpy. The loops that are sewn onto the harness will be threaded through the upper part of the pulley (see photos), then wrapped around the pulley and drawn tight around the top. When you run the speedbar line through the pulley, it cannot come off. There's no need to cut or sew anything. To adjust your speedbar, and to attach it in the first place, you will need to untie it completely. Run the cord down through both pulleys and tie a bowline knot just above the speedbar at the correct length - when your wing is attached and the sister clips connected, the speedbar should be just at the edge of your seat when you are seated in the harness. Once the length of the speedbar is adjusted correctly, the glider will hold it just against the edge of your harness when it is overhead. Before the glider is inflated overhead and during transport, it's a good idea to use the velcro Speedbar holders sewn to the edge of the harness seat, as there will be slack in the speedbar line, allowing it to hang low behind you, causing a potential hazard for tripping. Click photos below to enlarge:
If using the Speedbar during flight is excessively difficult to push with your foot, you can double the upper purchase with another pair of pulleys attached to the Sister Clips that come with the Speedbar. See photo below:
More pictures coming soon!
|
